ElasticSearch是著名的开源索引与搜索引擎。于2010年收发,ElasticSearch在如今的互联网中得到了大量的应用,在很多需要用到全文索引和站内搜索的场合,ElasticSearch都是非常优秀的解决方案。
ElasticSearch也支持集群部署。今天,我将介绍如何在Linux系统中部署ElasticSearch全文索引数据库集群。本文也是“搭建高可用的邮件服务器集群”系列文章的第三篇。在这个邮件服务器集群中,ElasticSearch集群将提供全文索引支持。
- 邮件服务器集群的架构与基本设置
- FoundationDB数据库集群的部署
- ElasticSearch全文索引数据库集群的部署(本文)
- Redis缓存数据库集群的部署
- Stalwart Mail Server的集群部署与配置
- HAProxy均衡负载节点的部署
本文作者为香菇肥牛,原文链接为 https://qing.su/article/elasticsearch-server-cluster-setup-in-linux.html, 转载请注明原文链接。谢谢!
1. ElasticSearch的安装
在开始之前,我们默认您已经按照前一篇文章的描述,设置好了防火墙,仅允许节点机之间的互相通信。
本文将使用3台节点机搭建ElasticSearch集群,每台服务器的地址为 mxa.qing.su (77.77.77.77), mxb.qing.su (88.88.88.88), mxc.qing.su (99.99.99.99).
我们可以在服务器中添加源,然后直接用包管理器安装openjdk17和ElasticSearch.
1 2 3 4 5 | apt-get install openjdk-17-jre-headless apt-transport-https -y wget -O /usr/share/keyrings/elasticsearch.asc https://artifacts.elastic.co/GPG-KEY-elasticsearch echo "deb [signed-by=/usr/share/keyrings/elasticsearch.asc] https://artifacts.elastic.co/packages/8.x/apt stable main" > /etc/apt/sources.list.d/elastic-8.x.list apt update apt-get install elasticsearch -y |
然后,设置开机启动。
1 | systemctl enable elasticsearch |
默认的elasticsearch安装会给JVM分配本机50%的内存。我们可以修改这一设定。通常,2 G内存分配一般就够用了。
编辑文件 /etc/elasticsearch/jvm.options,添加下面两行
1 2 | -Xms2g -Xmx2g |
请在每台节点服务器上按照上述步骤安装好ElasticSearch.
2. 配置ElasticSearch集群
在开始配置集群信息之前,我们先关闭每台服务器上的ES服务,防止后续出错。
1 | service elasticsearch stop |
接下来,我们需要在每台服务器中配置ElasticSearch集群的节点信息。需要注意的是,从ElasticSearch 8.x开始,默认启用了安全配置。我们可以一开始先禁用这个安全配置,后面再启用。
以节点A (mxa.qing.su, 77.77.77.77)为例,编辑文件 /etc/elasticsearch/elasticsearch.yml,设置下面的节点信息。
1 2 3 4 5 6 7 8 9 10 11 12 13 14 15 16 17 18 | cluster.name: mailcluster node.name: mxa node.roles: [master, data] network.host: 77.77.77.77 http.port: 9200 discovery.seed_hosts: - 77.77.77.77 - 88.88.88.88 - 99.99.99.99 cluster.initial_master_nodes: - mxa - mxb - mxc xpack.security.enabled: false xpack.security.http.ssl: enabled: false xpack.security.transport.ssl: enabled: false |
配置好每台服务器之后,依次启动elasticsearch服务。
1 | service elasticsearch start |
此时,在任意一台服务器上请求查看另一台服务器的ES状态,
1 | curl -X GET 'http://88.88.88.88:9200/_cluster/health' |
应该可以看到 status:green的回显,说明三台服务器的集群已经正常运行了。
1 | {"cluster_name":"mailcluster","status":"green","timed_out":false,"number_of_nodes":3,"number_of_data_nodes":3,"active_primary_shards":3,"active_shards":6,"relocating_shards":0,"initializing_shards":0,"unassigned_shards":0,"unassigned_primary_shards":0,"delayed_unassigned_shards":0,"number_of_pending_tasks":0,"number_of_in_flight_fetch":0,"task_max_waiting_in_queue_millis":0,"active_shards_percent_as_number":100.0} |
3. 配置TLS证书
和FoundationDB类似,我们可以给ElasticSearch集群配置TLS证书。从ElasticSearch 8.x版本开始,只有设置了TLS证书才能配置elasticsearch访问密码和权限。
首先,关闭正在运行的elasticsearch服务,然后我们在任意一台服务器上生成一个自签名的证书。
1 | /usr/share/elasticsearch/bin/elasticsearch-certutil ca |
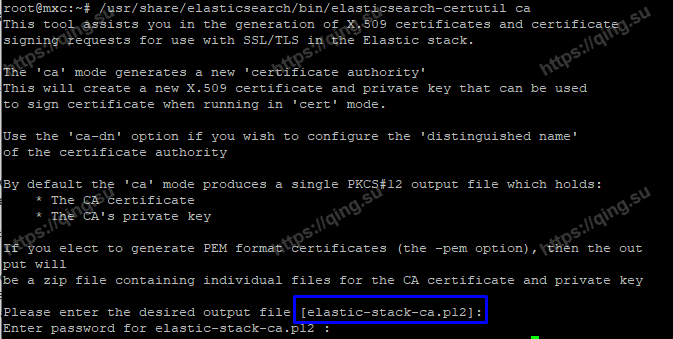
程序会引导建立一个ca证书,如果不修改默认参数,则在当前目录生成名为elastic-stack-ca.p12 的ca证书。
然后再执行
1 | /usr/share/elasticsearch/bin/elasticsearch-certutil cert --ca elastic-stack-ca.p12 |
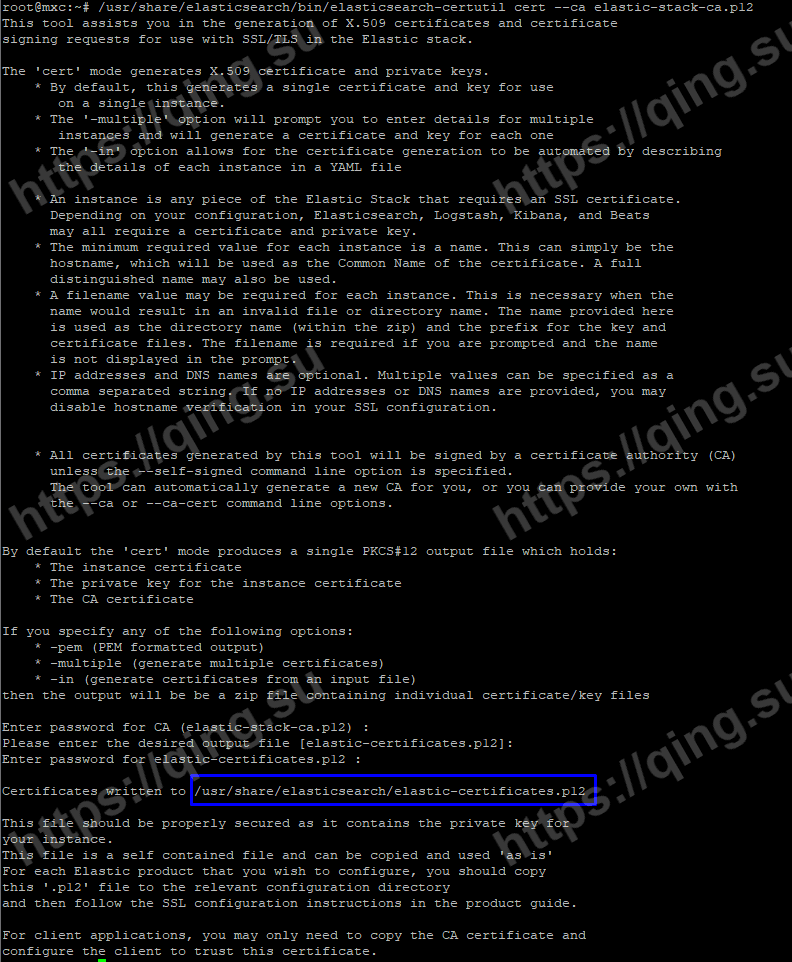
运行过程中会提示证书是否需要密码保护,这里可以直接跳过密码保护。此时在当前目录生成了名为 elastic-certificates.p12 的证书。将其复制到elastic search的配置文件夹。
1 2 | cp /usr/share/elasticsearch/elastic-certificates.p12 /etc/elasticsearch/ chmod 777 /etc/elasticsearch/elastic-certificates.p12 |
然后,请用scp等方式将这个文件复制到全部服务器的相同位置处。
编辑elasticsearch配置文件 /etc/elasticsearch/elasticsearch.yml, 添加TLS证书
1 2 3 4 5 6 7 | xpack.security.enabled: true xpack.security.transport.ssl: enabled: true verification_mode: certificate client_authentication: required keystore.path: elastic-certificates.p12 truststore.path: elastic-certificates.p12 |
在启动服务之前,我们还需要设置keystore和truststore的密码保护(设置成之前新建证书时的密码,如果当时没有设置密码,这里直接清空即可)。
1 | /usr/share/elasticsearch/bin/elasticsearch-keystore add xpack.security.transport.ssl.keystore.secure_password |
输入y覆盖密码。
1 2 | Setting xpack.security.transport.ssl.keystore.secure_password already exists. Overwrite? [y/N]y Enter value for xpack.security.transport.ssl.keystore.secure_password: |
以及
1 | /usr/share/elasticsearch/bin/elasticsearch-keystore add xpack.security.transport.ssl.truststore.secure_password |
输入y覆盖密码。
1 2 | Setting xpack.security.transport.ssl.truststore.secure_password already exists. Overwrite? [y/N]y Enter value for xpack.security.transport.ssl.truststore.secure_password |
在每台节点服务器上重复上述的配置。至此,我们就设置好了TLS证书。
最后,依次启动elasticsearch服务,继续接下来的配置。
1 | service elasticsearch start |
4. 配置elasticsearch访问密码
配置好TLS之后,我们就可以来设置elasticsearch的访问密码。
首先,设置管理员用户elastic的密码。在任意一台节点机上执行:
1 | /usr/share/elasticsearch/bin/elasticsearch-reset-password -u elastic -a |
会自动生成elastic管理员用户的密码,请妥善保管。
1 2 | Password for the [elastic] user successfully reset. New value: elastic_password |
然后,我们可以给stalwart设置一个专门的用户和密码。
新建一个名为stalwart_rw的权限组
1 2 3 4 5 6 7 8 9 | curl -X POST -u elastic:elastic_password "88.88.88.88:9200/_security/role/stalwart_rw?pretty" -H 'Content-Type: application/json' -d' { "cluster": ["monitor"], "indices": [{ "names": ["*"], "privileges": ["read", "monitor", "write", "manage"] }] } ' |
得到下面的回显
1 2 3 4 5 | { "role" : { "created" : true } } |
然后,新建一个属于stalwart_rw权限组的用户,用户名为stalwart, 密码为stalwart_password
1 2 3 4 5 6 | curl -X POST -u elastic:elastic_password "88.88.88.88:9200/_security/user/stalwart?pretty" -H 'Content-Type: application/json' -d' { "password" : "stalwart_password", "roles" : ["stalwart_rw"] } ' |
得到下面的回显,说明新建成功。
1 2 3 | { "created" : true } |
最后,我们再来验证一下这个服务器集群的状态。
1 | curl -X GET 'http://elastic:elastic_password@88.88.88.88:9200/_cluster/health' |
如果看到status:green, 说明全部设置成功。
1 | {"cluster_name":"mailcluster","status":"green","timed_out":false,"number_of_nodes":3,"number_of_data_nodes":3,"active_primary_shards":3,"active_shards":6,"relocating_shards":0,"initializing_shards":0,"unassigned_shards":0,"unassigned_primary_shards":0,"delayed_unassigned_shards":0,"number_of_pending_tasks":0,"number_of_in_flight_fetch":0,"task_max_waiting_in_queue_millis":0,"active_shards_percent_as_number":100.0} |

至此,我们完成了Elasticsearch全文索引服务器集群的搭建,并且配置了加密通信和用户名密码设置,满足了Stalwart邮件服务器集群的需求。如果您需要,您还可以继续自行安装Kibana图形管理面板,这里不再详述。在本系列的下一篇文章中,我将介绍Redis数据库集群的搭建。
如果您有任何疑问,欢迎在这里留言,我将尽力解答。
本文作者为香菇肥牛,原文链接为 https://qing.su/article/elasticsearch-server-cluster-setup-in-linux.html, 转载请注明原文链接。谢谢!
1 thought on “在Linux中搭建ElasticSearch服务器集群”